I was hoping that by now I could post a picture and a pat myself on the back posting about my first ride back on Golly after my knee replacement. I have to admit its a bit hard to write a blog about dressage riding when you haven't ridden for hmmm... let's see.... its been six weeks! I can't remember the last time I went six weeks without riding.
I had a goal to ride by week four and worked hard to get there. Like many riding goals though... you make them... you work hard to get there and sometimes it doesn't happen and you need to set new ones. Injuries of either you or your horse, weather, time conflicts or you just simply set a goal too lofty.
The Sunday after Christmas, I had it all set. It was an unusually warm and sunny day which would help ensure a mellow horse. A good friend had volunteered to get on first and then let me do the cool down. My knee was feeling good and my doc had given me the all clear to do any low impact exercise with "common sense and moderation". I was good to go.
Then a few hours before we had scheduled the ride, my knee got a sudden sharp pain that nearly knocked me to the floor. Turns out it my physcial therapists feel it was probably nerves refiring but it was a clear sign to me that I just wasn't ready and I need to let my body heal a bit more. Very dissapointing.
I am good with goals that require you to work hard. When my therapists told me that I would have to push past the pain and do my exercises every day multiple times per day, I made it happen. No problem. Now that they are telling me that I need to be patient and let my body heal, that's not so easy. Patience is not my best virtue.
But I've invested a lot of time off, pain, and work into this knee. I'm dedicated to doing it right.
On a positive note though... my husband made me what I am calling my "handicap mounting block" for Christmas. Its 2 feet x 3 feet wide, 2 feet high and very sturdy. I should be able to mount and dismount from it. I can't wait to use it!
Hopefully I will be on soon and will be writing about my first ride back but if not, I have some other posts that I have started that I would love to finish so either way... I'll be checking in soon.
Sunday, December 30, 2012
Friday, December 14, 2012
Post Knee Replacement - Resisting the Temptation to Ride
Its now been 2 weeks and 4 days since having my knee replacement surgery. I am walking without cane or crutches. If you don't see the big red scar on my knee, you wouldn't know that I recently had surgery. I am walking with just the slightest limp. Physical therapy is still taking up about 6 hours a week of my life but I enjoy the time there and like seeing the progress. At my Thursday appointment I could flex (bend my knee) to 132 degrees and extend (make it flat) to about 3 degrees. I am seeing big improvements in my flexing but the extension is slow work for me.
I started driving at the 2 week mark and at the same time went back to feeding and caring for my horses. Last week it was easy to resist the urge to ride because 1) I was in way too much pain to even contemplate swinging my leg across my horse and 2) I wasn't seeing, smelling and feeling his soft sweet muzzle.
Lately I have been contemplating how and when I will be back in the saddle. I want to feel that gentle sway and warm back again. The big wet sighing blow of the nostrils and relax of the back he does after a few circles around the ring. The perked ears in front of me leading the way on a new adventure. The smell of fresh air, horse sweat and leather.
This knee replacement was a big investment of pain, time, money, risk of infection, and the kindness of my family and friends who cared for me and my responsiblities though. I can't willy nilly just decide I want to ride and risk that investment.
But I want to ride.
So here is the plan....
Christmas is coming and my super talented husband has agreed to make an extra sturdy wide and tall mounting block for my gift. My instructor has agreed to ride him first and then let me do the cool down. I think with her help mounting and dismounting onto a sturdy base and settling for just ambling on a relaxed happy horse should let me test the waters in a safe sensible manner.
Before the surgery I was told that it may be three months before I could get on and I'm afraid they may stick to that plan. My post-op appointment is next Thursday and I'm hoping he is so impressed with my progress he agrees that I can move forward with MY plan.
Cross your fingers for me!
Wednesday, December 5, 2012
Partial Knee Replacement Healing and Rehab
In recovery a few minutes before they told me to walk. |
<Warning up high in this blog entry… I put some pics of the knee as it is healing at the bottom. If you are squeamish you may want to stop halfway through.>
I know many riders face this same decision so perhaps a log of how mine went might be helpful to someone.
My surgery was eight days ago last Monday. I arrived at the hospital at 8 am for pre-op, bloodwork and to confirm for the second time that week that I was not pregnant. (No chance of it but they didn't believe me.) The lack of fluids through the night made the IV difficult to place but by 10 am and with the help of the anesthesiologist; I had an IV and was bent over so they could place an epidural in my spine. I remember bending over and the stick and that must have been when they knocked me out because the next thing I remember was waking slightly during the surgery to have them tell me that it was nearing the end of the surgery.
I had an epidural so I could very lightly be put under (making it easier to come out of anesthesia). I woke up a couple of times during surgery but it was like being VERY drunk. I didn’t care in the least that I was in the OR.
By 12:30 I was in the recovery room and by 2:30 I was walking with a walker to the bathroom. I have to admit I was a little terrified when they asked me to walk and put weight on a leg they had just chopped but it turns out the pain meds were still working well and I did pretty well getting there.
I had what is called a partial knee replacement which means that they replaced only the joint on the inside of my knee – the area of my knee with the majority of the arthritis and the cause of my pain. The recovery is generally faster and there is much less blood loss.
By a little after 3 pm I was in the passenger seat of the car and heading home. The surgery was a little over an hour away from our house and I rode all the way home with my eyes shut praying I wasn’t going to throw up. (I didn’t but I had a bag ready.)
We had to pick up my son from school on the way. As he approached the car, “Mom, what is wrong with YOU?”
“I just had surgery… I don’t feel well.”
“Oh… well you look like you are dying.”
Thanks. You can always count on teenage sons for the truth.
The first couple of days were not fun. I had physical therapy the first day and they spend most of it trying to see how far they can bend your knee. I was sure the stitches barely holding my swollen knee together were going to burst in the therapists face. I couldn’t believe he wasn’t ducking.
Each day gets better though. You have a decent day and decide that sure… you can go to work for a couple of hours. I mean all I do is sit -- its not like I work construction. What’s the difference between sitting there and sitting at home? I tried going for two hours on Tuesday and paid for it all night. No sleep because the pain meds just couldn’t keep up.
I haven’t seen my horse since the night before the surgery. I hope he remembers me. I am hoping that next week I can start driving again and can stop relying on wonderful friends who are currently caring for my horses. Until I wean myself off the pain meds I can’t drive. Right now I am down to a little less than half the dose I was on the first week so I am getting there.
The good news is that although my knee hurts its completely different than the hurt before the surgery. Instead of getting worse every day … its getting better every day. I have high hopes that I will be riding soon and will be doing it pain free. The goal is to be able to bend my knee at least 120 degrees and extend it completely flat at 0 degrees. At my therapy session yesterday I was at 108 degrees flexion and 2 degrees extension.
I can’t wait to post the entry about my first ride after surgery. The sooner the better.
The picture to the left is the day after surgery. The word "Yes" I had to write
on there to make sure they replaced the correct knee. The knee to the right
is a week after surgery. The bruising didn't start showing up until
about day three.
Tuesday, November 20, 2012
Cross Country Clinic with Tom Mulqueen
Photo by Dorothy Anderson/Peacock Photos |
While it was called a Cross Country clinic, the main purpose was to teach horse and rider in a progressive manner how to successfully participate in fox hunting. While it would seem that fox hunting is just fast trail ride you do while dressed up, it is so much more! Being able to ride your horse at pace across varied terrain, with other horses very close and being respectful of the protocol that dictates the order of riders is important.
The clinic was held at the lovely Sam Hill Farm on a crisp fall day with a backdrop of changing fall leaves.
Photo by Claddagh Equestrian Center |
After they were all decently relaxed, Tom set us single file at a trot around the dressage ring leaving approximately a horse length between each of us. Tom made it clear that if we didn't maintain the length then we weren't "riding our horse, our horse was telling us what to do". After a bit he had us increase the length and change the line lead and direction.
After a break where we lined up for some words of wisdom, Tom had each of us canter individually around the dressage ring.
As each rider finished, he spent some time critiquing the ride and giving some tips on how we could improve. He did a great job showing how the critique would apply to all the riders, so the individual rider didn't feel singled out. I probably don't have these exact but some suggestions included:
- your horse only has so many hours that you can spend on his back, so when you canter you need to get off of him
- your stirrups need to be one to two holes shorter when going cross country
- you need to trust your horse - just like a marriage, once you decide he's the one for you, you have to trust him
- you can't push the gas and the brake at the same time - LET him canter (this one was for me)
- our job as a rider is to make the ride easy for the horse
They also worked some on jumping. After first introducing the horses to a new jump by jumping it individually, they jumped it lined up one behind the other.
Because Tom took the group through the exercices in a progressive manner, none of it was too difficult for either horse and rider. And while he encouraged each rider to do their best, there was no pressure to do more than you felt comfortable.
The clinic was a great last ride before I hang up my spurs for a bit for my surgery and I can't wait until my knee is healed so I can do the clinic next time it is offered.
Thursday, November 15, 2012
Riding Horses While Pregnant.... Dangerous but not for the reason you think.
When I was pregnant with my third child I was taking lessons at a local barn on my friend's horse. For each of my previous pregnancies I had also been taking lessons and as soon as I announced my pregnancy I was banished from the barn and told to come back once I had delivered. I got it. No one wants a pregnant woman as a liability.
With two small kids at home though, riding was the link to my sanity and I did NOT want to give it up this time. Of course, I also did not want to jeopardize my baby so I talked to my doctor about the effects of riding on my unborn little girl. He said the riding itself was not going to hurt her and even a fall probably would not hurt her as a woman's body protects the fetus very well. HOWEVER, a fall serious enough to hurt me could have repercussions as either the treatments required to cure me could be harmful or they would have to withhold treatments in order to protect my child. So the answer was go ahead and ride but .. DON'T FALL OFF.
If you are a rider, you know that is easier said than done. But again.. my sanity... I needed to ride or I would go nuts.
So I decided to ride and just be as safe as possible. I only rode horses that were very safe. I only did trail rides on horses that you could put a child on and then only at a walk. When working in the ring (and the trail as well), I always had someone there watching. And I didn't do anything that was too difficult for either me or my horse.
It worked for me. I know this is a personal decision that every woman rider needs to make on her own. For me, my sanity was worth the small risk I felt I was taking.
Everything went well until I was at the very end of my pregnancy. I was 30+ weeks pregnant and LARGE. I never did look like those women who have a cute little baby bumps resembling a small pea sticking out of their shirt. I looked more like I had stuffed a newborn elephant up my shirt and it was trying to escape. I felt like I looked normal and was always shocked when I looked in a mirror and saw that ginormous belly sticking out front -- really, how could I even be walking?
Back then (I delivered my last kid in 2001), maternity clothes were not the cool fashion statement they are now. Jeans were topped with a large white elastic band that strapped across the aforementioned large belly and, if it was posssible, made the belly look even larger. To hide the ugly fashion, you wore floating shirts that resembled a large Hawaiian mu mu. Pure elegance!
As I was reaching the end of my pregnancy, I decided to go out for one last ride. It was a beautiful summer day and there were a lot of people hanging around the barn. Riders and their families. As I rode around the ring, several people including some of the husbands were leaning on the fence watching.
I had been working on getting a solid simple canter change through a trot and never could quite get it. Finally today, it was clicking! Hurray!
In the last few minutes of my ride I was cantering a nice easy congratulatory loop around the ring and noticed people were watching a bit more intently. No more lazy lounging in the sun look. They must have seen our great change and were impressed!
Nope -- it wasn't looks of admiration I was seeing... as I transitioned down to a trot I noticed that my shirt had inched up and was now fully sitting on top of my belly and the large elastic band was hanging triumphantly out waving at all to see.
So I hung up my spurs that day with determination that the next time they saw me I certainly would not be sporting a big belly band!
My daughter was born a few weeks later, healthy, and to a sane and happy mom. And yup, just four weeks later I was at the barn riding around that same ring... sans belly band.
Tuesday, November 6, 2012
Chapter Challenge Recap
Ever hear of the Bad News Bears? That's was a good description of the Chapter Challenge.
For the past six months I have been battling a major loss of cartilage in my knee so it’s made it difficult to ride and care for my horse. In fact, for the two weeks leading up to the show I hadn't managed to get on my horse even once. Luckily, my trainer was able to hop on the day before the show and warm him up for me and then I hopped on for a short ride just to remind the two of us what relaxation, bend and straightness was. So I knew it wasn't going to be our best show but I had a willing equestrian partner so I knew it would go at least okay.
Hah!
I woke up Sunday morning with intense stomach cramps and let's just say I lost a lot of weight in the next hour. Nerves? Nope... this was much worse than just nerves.
I was contemplating how I was even going to get to the barn, much less to a show an hour away.
But... with a team depending on me being there in order for them to show, scratching was not an option. So I popped a bunch of meds with the hopes of at least getting a shot at getting to the show.
Luckily they worked. My stomach was still making some terrible noises and I felt horrible but I could at least leave the bathroom.
I got to the show and thanks to a tremendous effort from my team who drove with me, helped me load and unload, and braided my horse, I got through my test.
It wasn't my best test. In fact, it was one of the worst I've had in a long time but it was very respectable at 60% and helped our team earn a 3rd place finish.
Saturday, November 3, 2012
Grooming for a Cold Winter Show
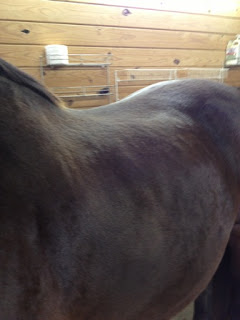
Golly prior to grooming |
Broom Brush |
So these are the steps I take to groom Golly when a bath isn't possible. I'm sure there are better methods (and I'd love hear them in the comments section) but this is what I've found works the best.
The picture at the top is what his coat looked like when I started -- I had my work cut out for me!
Rubber Curry |
After Using Rubber Curry |
I then use the broom brush again and that's when he finally starts looking like a show horse. Yes, there is hope! Depending on how dirty he is I may repeat the entire series of steps (broom brush, curry, broom brush) until he is looking decent.
This is when I have to use some water. I take a small towel and dip it in water and wring it out WELL! Its important the towel is just barely damp -- not dripping wet -- or your horse will be wet and cold. Its great if you have warm water to do this but if you run a no frills operation like mine you will be dipping in cold water. It really doesn't make much difference to the horse because you are using so little water and you aren't trying to get him wet. In fact, if you get him wet you are doing something wrong and your horse will be very cold.
Using the towel I rub it in a circular motion in any spots that still look dusty. Usually this is in the spots that "stick out" such as hip bones or hock joints. Or in the spot I called the "tickle spot" where his hair grows the opposite direction just under his loin. (I have no idea what that is called -- anyone know?) Use some elbow grease and rub well!
Be sure you rinse your towel frequently and wring well again so you aren't just mixing mud on your horse.
After I've hit all the dusty spots, I lightly rub his entire body with a clean damp towel to get any remaining dust.
After I think I have most of the dirt, I sometimes use a little Show Sheen (or whatever conditioning product you like) sprayed into the towel and rubbed in like I did the water.
Be VERY careful not to get the Show Sheen anywhere near the saddle area though as you are essentially polishing your horse and your saddle will slip and slide. Can you imagine your saddle slipping completely around your horse during your test?!
I then let Golly dry completely tied in the cross ties while I work on his mane or clean stalls. It doesn't take long as he is only slightly damp. You can take a dry towel and rub it in deeply to get any remaining moisture out and hasten the drying time.
Once he is dry I use a polishing brush like this one to get the final polish on him. The final touch is to put a sheet or blanket on him (depending on the temperature), put him out to pasture and pray he stays somewhat clean!
Its not a perfect method but it does get a decent show glow on him and keeps him warm and dry in the colder show months.
Tomorrow is the big show. Hopefully I will have some good things to report both about our ride and our Charles County team.
I'd love to hear YOUR tips on grooming in the winter.
Tuesday, October 30, 2012
Post Hurricane
The horses ended up staying in the stalls from 4 pm yesterday until almost 8 am this morning. When I put them in last night they were shivering which is unusual but I think the high winds drove the water past their protective hair barriers. After a few minutes of munching hay though the shivering stopped.
When I got there this morning they were happy to see me as they had devoured the huge piles of hay I had left for them. The byproduct of their eating was evident as well because the stalls were a mess. Definately filled the wheelbarrow!
I went back and forth on whether to leave them out considering the shivering from last night but figured it would be fine since the rain was back to its normal vertical path without the high winds.
Golly went straight to the pile of hay in the run in and was suprisingly calm going out even though he had been locked up for fourteen hours. He had no interest in going out in the rain.
Pony (yes... we call her Pony. Her name is really Sunny but Pony just fits her better), on the other hand ran straight to the oak tree. I hadn't realized she was eating acorns but she obviously likes them which concerns me since a plethora of them can cause some intestinal issues and even death if they eat too many.
Its hard to tell in this picture through the rain but she is happily munching acorns in the rain. You can see in the distance the big tree that came down on the fence. Luckily I left the gate open and most the tree fell through space rather than crushing the metal gate.
I felt a bit better about the acorns when she only stayed out their a few minutes and was quickly back with Golly under the run in. Definately need to keep an eye on her acorn consumption though.
Glad the hurricane wasn't nearly as bad as predicted. I hope your family, pets and horses included, did fine too.
Monday, October 29, 2012
Hurricane Prep
As Hurricane Sandy descends on our area, I am trying to decide the best way to protect my horses. If you read the "official" advice given, its best to leave your horses outside in an open field with little debris. With 75+ hour winds projected I think it is impossible to prevent debris coming across their field. I am worried about the debris hurting them.
On the flip side, high winds have a decent probablility of bringing a barn down with them trapped inside.
The dilemna.
I think I am going to do a mix of both. They are outside now but I think after dark I will put them in the barn for the night with the thought that during the night they can't see the debris coming across the field towards them. In the morning, high winds or not, they will go back out.
At least they are on high ground so I don't have to worry about flooding. Just in case of electricity outage I have filled buckets, soaked a pile of alfalfa pellets and filled the BIG water trough.
What have you decided to do with your horses?
Thursday, October 25, 2012
Bubbles on My Saddle
This post is reaching out for some help. A few weeks ago I noticed there were some small bubbles on my saddle. It almost looks like small pimples under the top layer of leather. I've never seen this before and I'm not sure how to combat it. I love my sadddle -- a Black Country dressage - it fits Golly exactly right. I definately want to be sure it lasts as long as possible.
I did a good cleaning and conditioning on it last week but I'm not sure that is the best move. If there is moisture under the leather causing this, conditioning may just hold that moisture in further. Here's a look....
So what your thoughts? Have you ever seen something like this and how did you combat it?
On a positive note... I want to share how much I LOVE my bridle. In April I bought a new bridle as my existing one was literally falling apart in places. I held off as long as I could because I wanted to get a good one and heck... those are expensive! I found a great company called Five Star Tack (http://www.fivestartack.com) when they made donations to CANTER Mid Atlantic. Their tack is both high quality and unique.
Golly has a wide forehead and requires a wide browband. A regular horse size is a bit too small and the oversize is too big. He's a tough fit.
The great thing about Five Star Tack is that they work with you to find the perfect fit. After an in depth conversation with them they suggested the regular size should work. When I mentioned that I liked the star browband, she swapped that browband out with another bridle and essentially created a custom bridle for me. Even better ..... when the bridle came in and the browband was too small, she swapped out a larger one for it. That's great customer service!
I love the celtic cross, the leather is supple, its nicely padded and all the hardware works great. Its nice to purchase something and really love it. Here is Golly in his bridle after our ride this morning. Isn't he handsome?
Sunday, October 21, 2012
Canter... Simple, Right?
From what I know the horse has three natural gaits -- walk, trot and canter. I base this assumption on the fact that MOST horses will perform those three gaits naturally while in the field with their friends. In Golly's case he would tell you "woah" is a gait too since its his favorite but I digress.
In the first couple years I had Golly I never saw him canter in the field. His pasture mates could be galloping across the field and there Golly would be.... trotting as fast as he could behind them. For him, canter was not a natural gait. So its something we have put a lot of effort into and because of this I've put a lot of thought into it as well. We have a long ways to go before we have a "good" canter but so far here are some things we've learned.
Check Your Horse out Medically First
When we first started to attempt the canter we got explosive bucks during the transition. I just thought he was being a pain and kept at it. Eventually he developed some light lameness. I gave him some time off but it did not improve. After a vet evaluation we decided to inject his hocks and that was the magic trick. At first he still bucked some in the transition but they gradually decreased. I think at first he was just anticipating the pain and once he knew it was no longer there, he started to accept the canter more.
If your horse is acting outside his normal character, it may be a medical issue and not a character issue.
Value of Lunging
Don't underestimate the value of lunging for a horse having trouble picking up the canter. Both "regular" lunging and free lunging (lunging at liberty in a smaller ring without a lunge line) allow the horse to find his own balance without having to worry about a rider's balance and weight. Frequent transitions while lunging is very beneficial as the transitions are usually where they are having the most issue. Mix it up though -- do quick transitions and then let him travel a circle or two without a transition.
Tips & Tricks
For every person you ask you will get a different answer on how to do a canter depart. Beyond the "how to" which I will leave either for another post (once I completely figure it out) or to others, here are some things that have helped me.
Preparation: For a horse like Golly that is more on the lazy side, I found that preparing his mind and body in the trot is important. I spend a decent amount of time making sure the trot depart is with the lightest aid possible. I don't want to be kicking him into a the trot depart but rather "allowing" it to happen by opening my hips and thinking trot. My instructor describes it as a "puff of air" pushing him forward. I imagine a sail filling with air and pushing a light sailboat down a river.
Once the trot departs are working well, the canter depart works the same way. Think a bigger puff of air and again... allow the canter to happen via opening your hips rather than kicking him into it.
Think the side pass: Another thing that has helped is that right before the canter depart I think a side pass to the outside rail. I don't actually do a side pass but I do bend Golly slightly to the inside and get the feeling of a side pass before I ask for the canter. Its a split second type of feeling. Kind of like a half halt would be... it preps him for the canter but is not actually part of the aid for it.
I hope some of what we learned helps you. I'd love to hear some of your tips for cantering in the comments section and see if we can apply them to our training.
Friday, October 12, 2012
Tenacity
As the blood ran from my finger and dripped on my newly
polished show boots, I thought to myself that the gods were against me from
making it into the show ring that day.
The day had started out okay. Although a
dressage rider typically, I am between two levels, so I decided to attend a
local hunter show so my horse would remember show rings were not
scary. My classes were in the afternoon so I was able to leisurely
hook up my trailer and head to the show grounds. My only issue was that I
had recently torn the cartilage in my knee so getting on my horse was a bit
tricky – but I knew I could get some help so I wasn’t too worried. So
hobbling on my crutches, I signed up for my two classes and headed back to the
trailer.
After pulling my trusty horse Golly out of the trailer, I
gave him his final beauty treatments and saddled him up. It was then that
I realized I had forgotten my stock tie. This wouldn’t be a big
deal except that with the temperatures hitting the 90’s for the first time that
year I had decided to just wear a plain sleeveless t-shirt under my jacket so
the stock tie was essential to hide the casual attire.
Ah well… a quick phone call to my husband solved the
problem. He would run it by the show grounds on his way to another
errand. Day saved! Or so I thought….
With one problem solved I turned to getting dressed as much
as I could while waiting for the stock tie. I usually have problems
getting the zipper up on my boots. I was pleasantly surprised when
they quickly zipped up and didn’t even feel tight! My glee quickly ended
though when I realized the zipper was split wide open to the back! Not
only was the zipper shot, the zip was all the way to the top so I couldn’t get the
boot off without somehow jimmying the zipper back down to the
bottom.
That’s when I got the dumb idea to try to use safety pins to
hold the back of the boot closed. While maneuvering the pin into the
zipper, I stabbed my finger and must have hit a nice vein. Blood shot out
from the finger and splattered on my shiny black boots. Safety pins did
not seem to be the answer. After cleaning the blood from my boots, I
pried them off my legs and then just sat on the edge of the trailer laughing at
my predicament. Surely I was not meant to enter this show. I should
just go home and consider it “one of those days”.
Nope – my hard head prevailed. Barefoot and with
my crutches I hobbled over to my neighboring trailer, and asked “Hey, you don’t
happen to have any black duct tape, do you?” Looking up from his sandwich
with a look of “hey weirdo”… he responded, “Nope.. no duct tape.”
Hobbling to the trailer on the other side, I asked again,
“Hey, you don’t happen to have any black duct tape?” Success!
While it was not much they had probably just enough to patch my boots back
together. Shoving my foot back into the boot I eagerly starting
taping up the back only to find that duct tape does not stick to newly greased
boots. Another setback.
My friendly neighbors, noticing that I was taping up my
boots – or at least failing at taping up my boots – came to my rescue
again. “Hey, I think I have an extra pair of boots if you want borrow
them.” Thankful, but not hopeful, I returned, “That would be great but
my one calf is huge due to a horse kick so I need a 17” calf. No chance
of you having that!”
“Hah, you would be surprised. My calves are even
bigger and I had these custom altered – they may work.” Digging back
behind a pile of long unused tack, she pulls out a moldy pair of boots.
“They are dirty but if you are willing to clean them you can give them a try.”
Still not hopeful I headed back to my trailer only to
realize that they are going to require boot pulls which I don’t
have. But I DO have two hoof picks which handily hook into the loops and
ease the boots onto my calves. They fit like they were built for
me! Yes!
Two seconds later my hopes are dashed again as I stand up
and realize the sole of the boot is not at all attached to the boot. But
wait! I still have some duct tape. A few quick
additions of duct tape and I have a nearly custom pair of boots.
Ten minutes later with some saddle soap, which I just happened to have in the
trailer, and elbow grease they actually look pretty good!
I’d love to say that I sailed into the sunset with champion
ribbons but that would too good of an ending. However, I did get into my
classes and placed a respectable fourth out of ten horses. Not bad for a
short warmup and shoot.. I didn’t even think I’d make it into the class!
Crutches, missing apparel, split boots, borrowed boots, repaired
boots. I had hit them all.
Later when I got home I realized that it was tenacity that
got me through the day. I could have given up at any point in the day but
each time a stumbling block arose I found some way around it.
Much of horse training requires tenacity. I
don’t have the fanciest horse. I am fairly certain he was an Amish cart
horse in his first life. He was not built to be light on his feet or to
dance under a rider. Despite this I decided to turn him into a dressage
horse. Probably not the best move but with a full-time job and three
active kids I needed a horse that I could ride safely whether I rode him every
day or two weeks passed. He fit the bill.
My instructor repeatedly told me that I needed a new horse
if I was going to get anywhere with dressage. This horse was not going to
get me there. I knew however that my horse was going to keep me safe and
I just kept plugging at it. Four years into this dressage experiment, my
instructor is singing a different tune. We both agree he is still not
built to do the job I chose for him. However, he is a pleasant steady
horse that understands his job and tries hard and more amateur riders need a
good safe horse like him.
Dressage is meant to be a life long pursuit of the pyramid
of training. Its not meant to be a quick rise to the
top. It requires tenacity of both horse and
rider. Steadily plug away at the obstacles put in front of
you – whether they are confirmation or equipment obstacles – or whatever
personal obstacles you have – keep plugging – tenacity will get you there.
Saturday, October 6, 2012
Putting Together a Quadrille Team
I was recently part of a quadrille team and thought that some of the things we learned when putting it together would be helpful to someone else attempting the same.
Quadrilles are lots of fun both to do and to watch. They are essentially four riders syncronizing their riding to music and performng a set pattern. The most important element is the syncronization and accuracy of your pattern so having a steady tempo and riders who can "watch" out for one another and temper the pace of their horse to match the others is crucial.
Choosing your Team
Its great if you can find four horses who are similar in color and size. If not, having pairs is helpful -- for example, two greys and two bays. Or two ponies and two horses. Even more important is that the horses have similar paces.
This is not necessarily about choosing the best "movers" unless you have FOUR good movers. If you have one horse with extravagent lovely gaits and three with average gaits, its not going to work. If you have one horse who really moves out, that rider is going to spend a lot of effort shutting that horse down to match the others. What you need are four similiarly moving horses that are steady decent movers.
Its also important to find horses that like to work with others. Quadrille relies on the horses getting CLOSE and some dressage horses like to be more solitaire than quadrille requires.
Very close to the debut of our quadrille team at a show, one of our team members broke her arm. We decided to substitute her with a very qualified rider who had a lovely horse. While the mare was a great dressage horse, she did not like working with other horses and the show was a disaster. Well, maybe not a disaster because honestly we all had a great time laughing at ourselves. Even the judge was laughing. You could tell we had most of the moves down but the horses just did not want to be with eachother. At one point, my horse did a spin that could qualify for a roping competition and at the end, the mare was so fed up with the situation she bucked across the arena like a dolphin. Take a look... we don't mind you laughing at all!
Choosing your Pattern
Many times there is already a chosen test or pattern for the show and the easiest thing is to use that established test. For example, the PVDA uses the United States Dressage Federation tests. There is a test for Basic (walk/trot), Training, and First through Grand Prix. You can also come up with your own to match your selected music. If you decide to design your own, using the movements in the USDF tests in a different order to match your music is a good starting point.
Starting Practice
We spent WAY too many practices learning the test. Its much harder to learn the test with four riders on horseback -- not only are you learning the test but the riders are distracted by the horses getting used to one another. For at least the first practice, I suggest leaving the horses at home. Set up a very small dressage ring (to scale but about a tenth the size) and walk out the test on foot. A good way of creating a small one is using sidewalk chalk on a driveway. Then walk it out on foot. Trot when your horses would be trotting. Canter when your horses would canter. You'll feel silly but 1) its much faster to learn it this way and 2) its fun!
Once you have the test down cold, THEN start practicing on horseback. Once you are mounted, have a person on the ground to let you know if you are lined up correctly and where you are making mistakes. Its doesn't have to be a person schooled in dressage. At this point its not about proper bend or collection. Its about being EXACTLY opposite one another or lined up EXACTLY behind one another when you should. The more accurate you can get this the better. When you come down a line behind one another, the judge should only see the front horse if you are doing it correctly.
Choosing your Music
Choosing music is hard -- mainly because there are so many choices. I started by listening to cd after cd trying to imagine how the horses would look "dancing" to the music. What I should have done was narrow my choices first by the length of the song. Sure you can edit the music to be whatever length and tempo you like but if you are like most people this is beyond your capabilities and frankly there is enough good music to choose from that will meet your needs so why work so hard?
However, if you have someone with good computer ediitng skills, the best route would be to meld three different songs -- one for each gait.
So start by choosing which genre you like. You are going to listen to this music a LOT so you better like it. If you hate classical music, don't choose it. If rock is your thing, find a good rock song. Everyone will give you a different opinion on whether the song should have lyrics or be just instrumental -- decide what's best for your group.
Another important element is the Beat Per Minute (BPM). You can use a metronome to measure how often your horses foot hits the ground per minute to determine this. Take the average of all the horses in the group. Hopefully all four have similar BPMs.
Since most of the test is done at the trot, you should start there. Let's say that your trot is 76 beats per minute. You need to find a song that matches that beat. As an example, the Training level test is 5 minutes and 50 seconds. If you can find one that is close to 5 minutes 50 seconds you may be able to start there if you want to stick with one song -- especially if it has some slower sections you can use for walk.
A great resourcs is Mike Matson's website -- http://www.equimusic.com. You can put in the beats per minute and get a full list of songs. He also does a great clinic where he brings out his music and plays it for your horse until you get just the right song. He then burns a cd for you to take home.
Once you have the trot selected, then you need to select a walk and canter that is in the same genre.
Try them out with your horse. You may find that one song or genre really gets your horse going -- you will be surprised at how much they respond to the music.
Practice and have a Backup
Our team practiced from early Spring until November at least a couple times each month. It takes a while to get the basics down and then you start perfecting all the little elements. Its a good idea to have five team members in the event that a horse or rider is injured on the day of competition.... which is of course a high probablity when you are working with horses. Swap that alternate in each time someone can't make practice and on the days when all four primary members can make it, use the alternate team member as your eyes on the ground so they are as familiar with the test as the primary riders.
Accuracy is the key to a good quadrille. Perfect circles. Turning at exactly the same time. Horses lined up so precisely that the judge can only see the horse closest to them. Being exactly opposite one another when doing mirroring elements. Little things like saluting the exact same way and at the exact same time makes a difference. You can usually wear outfits a bit outside the norm for a quadrille so it may be fun to have costumes that match your music or matching colorful shirts.
Despite our injuries and swapping of horses at the last minute, the practice paid off. We were the 1st place winners at the Chapter Challenge that year. A video of the final product is below.
Quadrille is lots of fun and is a great way to ride together with other members of your riding clubs. Its particularly good for kids who like the comaradarie of riding together. Hope our experience helps make your journey in quadrille a little easier!
Friday, September 28, 2012
When Are you Going to Learn to Ride?
"When are you going to learn to ride?" I can't count the number of times I have heard that phrase when I tell my non-horsie friends that I take riding lessons. In their eyes, there is an ending. Some time that eventually you "get it" and have accomplished your goal of being a rider. And really... how hard could it be to plop your butt on the horse and amble around?
I always respond that even Olympic riders continue to take lessons. Whether you are an equestrian or a gymnast, there is always room for improvement and coaching. And I am NOWHERE near an Olympic rider so I need even more coaching!
One of my favorite dressage riders is Steffen Peters. He truly dances with his horses. They move as one, playing off eachother. When I watch him ride I'm not sure who is leading the dance -- it appears to be a cooperative effort -- as if the horse and rider make the same decisions. Even better is when Steffen and his horse ride to music.
Steffen Peters is a three time Olympian and bronze medalist. At that level, you can safely say that he has "made it" to the big leagues and in the eyes of my non-horsie friends has probably learned to ride. No need for lessons here, right? Wrong.
Steffen Peters continues to take lessons and has coaches to help him. His wife Shannon is his frequent "eye on the ground" in addition to outside coaches. He also trains with a personal trainer off his horse three times a week for core and cardiovascular training.
I study dressage. I read books. I watch clinics. I take notes. I write this blog to help me clarify my thoughts. Despite my study, I still don't know even a smidgin of what I want to learn about dressage and even the things I DO know I don't always practice.
I know that I should have a straight line from shoulder to hip to heel and strive to keep that outline but its hard to tell if you really have it right. Its something I struggle with and there have been multiple situations where my instructor tells me my heel is too far forward on the horse. I swear it FEELS like my foot is exactly where it should be but that's what a bad habit is.... repeating something that is incorrect even though you know better. Without those eyes on the ground to tell you the reality, you will continue to repeat it and the habit will become even more ingrained.
So yes... non-horsie friends... I still need my lessons. And when will I learn to ride? Probably never but I hope I am improving.
Friday, September 21, 2012
Wacky Horses and Finding the Good in Not so Good Lessons
I had an early morning lesson today before work. The air was crisp and clear with that fresh, almost washed smell to it. Fall.... ahhhh... one of the best times to ride. No bugs and nice cool weather.
That nice cool weather brings something else .... wacky horses.
It started in the cross ties while I was tacking up. Pacing and prancing. Wrenching his head around sure that a monster was bound to jump out of the hay room. Eyes wide. Yeah.... this was going to be fun.
To add to the fun... a large tree branch had come down in the arena. Now you and I know that the tree branch most likely will not sprout wings and come flying towards us throwing rocks but Golly was sure it would.
At this point I knew that the lesson was not going to be our best. So how do you take what is sure not to be your best and make the best of it?
Don't Fight It
I had a couple of options at this point. I could get on and spend the next thirty minutes trying for relaxation while I prayed for him not to kill me or I could take the smart and safe method. I took the smart and safe method and lunged him first.
Its not wimpy to lunge your horse first. You don't want a horse that requires lunging for every ride but sometimes he's just nuts and he needs an opportunity to find relaxation without worrying about you on his back -- and you worrying about coming OFF his back.
If you Lunge, Lunge with Purpose
Today Golly was afraid of the big evil branch in the corner of the arena. So after we got some relaxation in the "safe" areas of the arena, we moved closer to the branch and worked there until he sighed and realized it wasn't going to eat him. Lunging is not just chasing your horse in circles to tire him out. Its a great time to start the work you plan on doing under saddle. Work on transitions and bend. Keep on the circle and then lunge him down a straight line. Mix it up and do all of this near the scary part of the arena so he has something to think about besides the big scary item.
Let Go of Frustrations
Sure its frustrating to pay your instructor expecting that you are going to achieve big and bold things and then your lesson is five steps back from where you were last week. Its easy to get frustrated with yourself and your horse. Okay.... I give myself permission to be frustrated with myself (even though I probably shouldn't) but its not okay to be frustrated with your horse. He really DOES think that that branch is going to eat him. Its not his fault that he was born a prey animal and that you didn't take the time to ride him in the last week and now you want him to bend and contort and hey... be light on your feet too! Take the day for what it is and do the best you can for that day.
Get What you Can From the Lesson
Once you sigh and realize that today is not the day you are going to recognized by the Olympic scouts, get what you can from the lesson. Today I realized that he is not going to relax and stretch his neck unless I relax my hand and LET him. Its hard when you have a bundle of nerves under you threatening to explode to react by RELEASING the rein but once I did, he relaxed and found the space. I learned a few other good tips... but that is for another post!
Tuesday, September 18, 2012
Mashed Potato Butt
It was one of those rare days when I had time AND the weather was beautiful. I decided I would rather ride in our local park than do my usual dressage ring work.
Although I didn't know anyone at the park, I did my normal "Hey, can I ride along with you" to the ladies parked next to me and we headed out to the trail. (My husband alters the conversation a bit when I tell him I do this to "Hey, my name is Brianna. Will you be my friend?")
As we ambled down the trails we got to know one another and one of them asked me how I sat the trot without bouncing. Well first... I was shocked she didn't think I bounced! While I am working on the sitting trot, it certainly is not stellar. Then I was a bit excited.. maybe I am getting somewhere with this dressage thing!
I asked her to trot off so I could see what she was doing and why she was bouncing. Her horse was gaited so she was right to assume she should be feeling like she was gliding rather than bouncing across rough water on a boat. Yup.... she wasn't imagining it... she was bouncing.
I noticed that as soon as her horse started trotting she tightened her butt muscles and upper thighs. The effect was like a nutcracker. As her legs tightened and squeezed, her butt rose from the saddle and became tight. Her horse felt the tightness and responded by tightening his back. The tighter her butt, the tighter his back. The tighter the back, the more she bounced. The more she bounced, the tighter his back.
I asked her to come back to a walk and imagine her butt was soft fluffy mashed potatoes. Let the butt sink into the saddle like it got plopped onto a Thanksgiving plate alongside the turkey.
Once she got the feel of mashed potatoes, she tried the trot concentrating on keeping the mashed potato butt. Aha! Nice soft trot from the horse and she stayed in the saddle.
A few strides into the trot, the butt started tightening and she started bouncing. She returned to the walk and got the mashed potato butt back and tried the trot again. Each time she repeated, she was able to keep the soft trot just a bit longer. Like everything with the horse, practice until you think you have it and then practice it some more!
Thursday, September 13, 2012
Overcoming Obstacles -- When My Knee Prevented me from Mounting
Right around Easter my knee started having some major health issues. For a month or two I couldn't walk without crutches. Of course I didn't want to stop riding though just because I couldn't walk!
Unfortunately it was my left knee with the problem -- my mounting leg. I knew it would be an issue if the horse moved so I asked my daughter to hold my horse while I tried to mount using the mounting block. I grabbed the mane to help pull me up. I lowered the stirrup. I wrapped my arms around his neck. I tried mounting from the other side. Then I cried. I just couldn't get my butt into the saddle. I took a break and tried again. Another failure. I cried some more. This was truly worthy of a pity party. Waaaaa! How could I live without riding? (And yes... if my husband reads that line he will probably laugh... but really... my horsie friends get that I am serious.)
I gave it a few days and thought about how I was going to make this work.
I needed two things -- the horse to stay absolutely still (and not have to find someone to hold him each time I got on) and a way of getting on from a higher point.
So I dragged a large plastic tack box to the arena and placed it parrallel to the arena wall with a space about the size of a trailer stall between it and the wall. I then placed my mounting block along its long side effectively making a stair.
Now to see if it worked! I led Golly into the chute created between the arena wall and the tack box. Because I had it in the corner the chute had three sides so he had no way to move unless he went backwards. No side steps!
Walking easily up the stairs I easily swung my leg over his back and tada! I was astride! Then a simple rein back out and I had accomplished my goal.
The added benefit of the chute system is that Golly has drastically improved his rein back as he is being forced to go straight out the back with no wiggle.
Tuesday, September 11, 2012
A Short Post regarding Feed
I found the coolest thing this week and want to share!
I have two horses with dramatically different feed needs. One is an older pony with heaves and the beginning signs of Cushings that is fed a huge amount of food in relation to her size. The other is a 1300 pound draft cross who stays fat on air. I've struggled on how to keep weight on the one and get nutrients in the other without making him puff up like a marshmellow in the microwave.
I mentioned this to the girl at the counter at Southern States and she handed me the number of their feed consultant. Turns out that Southern States has 150 employees trained in horse nutrition. You can call them anytime and they will help you develop a good feeding program. What a wonderful resource!
I gave her a call and about five minutes later got a call back. After a 45 minute chat I found that the feeding program I was using was spot on. So... I didn't get a new feeding system but I do feel much better that I am doing the right thing. Worth every dollar of the free service!
Thoughts regarding the Rein
Looking back at my notes I have quite a few comments regarding rein pressure, direction and weight.
And the #1 thing to remember about rein pressure. Use your seat FIRST and the REIN second. We all have a tendancy to reach for the rein as the answer when the first tool should always be the seat. Use those seat bones and weight to get what you want and if you dont get the answer, then use the rein in conjunction.
- Its okay to use an opening rein when training. Use the open rein to create space for the horse to come into.
- Once your horse is a bit more "trained" you need to start moving and keeping your hands in a smaller space located in front and close to the withers.
- Approximately 2/3 of the weight should be in the outside rein and 1/3 in the inside rein.
- The outside rein creates the "wall" or the space for the horse to stay within.
- The insides rein suggests bend.
- The outside rein should be as steady as possible. The inside rein has more movement and can be used to correct bend etc. by jiggling and slight movement.
And the #1 thing to remember about rein pressure. Use your seat FIRST and the REIN second. We all have a tendancy to reach for the rein as the answer when the first tool should always be the seat. Use those seat bones and weight to get what you want and if you dont get the answer, then use the rein in conjunction.
Friday, September 7, 2012
Shut Up and Ride... Sometimes.
Today's lesson brought a few aha moments.
For one of them I had to stop and spend a few minutes really figuring out what my instructor meant. .... which is an aha moment in itself. I was going round and round and she was repeating the same thing over and over which meant "duh... I wasn't doing it right". The bad part was that I wasn't even sure what I was doing wrong or even what she really wanted. I could have kept going around trying and failing or I could stop and figure it out. Going around trying things and failing really isn't fair to my horse so I stopped. After a few minutes repeating back to her what I was thought she wanted and her confirming that yup... that wasn't it... I finally got it!
For the most part I think to be a good student of dressage you need to most of the time just shut up and listen. Do what you instructor says and don't try to over analyze it. Do exactly what they say and worry about the "why" later. Usually in the process of "doing" the "why" becomes clear.
However, sometimes when you aren't even sure "what" they want you to do, you have to stop and ask. Its a good use of your lesson time.
Today I was collapsing in on my inside waist line. Because I wanted HIM to bend, I was bending at MY waist and destroying his straight line. What I was getting was his inside shoulder collapsing with mine and his outside shoulder bulging out. (You will begin to see that is a common theme with our riding!)
What I needed to do to correct it was to straighten my inside waistline, sitting up tall, giving both sides of my waistline a feeling of stretch. That gave us the straight. Then to get the bulging shoulder back in line I needed to drop my outside hip in effect pushing his outside line in and forward.
Two more aha moments followed... but those are for another post. Stay tuned!
Monday, September 3, 2012
Walk Means Walk
An "aha" moment I had a few months ago regarded the transition from trot to walk.
When I transitioned from trot to walk I got the walk but it was a ambling walk, not energetic at all. Then I gave him a kick to get the walk I really wanted.
One day I had an "aha" moment that made me realize I was punishing my horse for doing exactly what I asked. Instead of asking for an energetic walk, I was asking for a cessation of the trot.
What's the difference? Lots. Asking for cessation of trot can mean lots of things.... walk with energy, ambling walk, halt, slow trot, quick walk. Asking for an energetic walk means just that..... an energetic walk. Its not your horse's fault if he doesn't answer correctly if you don't give a clear question.
So... if you are transitioning from trot to walk, ask for the walk you want -- not the cessation of the trot. As you are trotting, start to visualize the desired walk and then clearly ask for it.
Favorite Method to teach Trailer Loading
While not strictly about dressage, if you can't get your horse on the trailer you certainly are not going to get to your dressage show so I thought I would include this as well.
Over the years I have worked with many horses on trailer loading and now have a quite an arsenal of approaches. Each horse is different and so each approach has to be slightly different as well. The one thing that is consistent for all horses is that it takes patience. The moment you try to rush the process or do a "trick" to get them in is the moment you lose the game. You may get them on the trailer that one time but you haven't taught them anything and thus you will be starting at a spot even further behind then the first time because you have a horse that still doesn't want to get on the trailer but also knows your new trick and how to evade it.
You could write a book on all the different methods for trailer loading and I am trying to keep each of these postings somewhat short so I am going to focus on just my favorite method here. Believe me -- I've tried everything on horses -- I even had one that the method that ended up working for her was to blindfold her and lead her in backwards!
To start... make sure you have gloves on in case of pulling and good footwear.
Before I even get close to the trailer I start by working the horse on the ground away from the trailer. We work on simple commands to make sure the horse is listening to me. Walk. Woah. Walk. Woah. Circle. Backing up. Going between items -- making them closer and closer at times to simulate the "squeeze" of the trailer.
Once I know the horse is listening and calm I start doing the same exercises near the trailer. If calmness continues then I try simply to walk the horse on the trailer. Lots of times if you have the horse already listening to you that works. Many times it does not.
If it doesn't then I get a long lunge line and feed it through the opening to the trailer stall, threading it through the escape door and back to me. Once I have the lunge line in place, I lead the horse to where I can hook him on it but not terribly close to the door. At that point I can stand near the entrance with a line to direct their head to the trailer entrance and my other hand free to use a dressage whip. With their head facing the door I gently tap their back leg. Not hard..... more of an annoyance. A bit more annoying than a fly but not by much. The SECOND they take a step forward I stop the tapping and tell them "good boy" and let them stand to relax. If they pull back some that is okay. Its not about forcing them forward.
I continue the tapping in sequences as they move forward, letting them relax a bit in between. They may swing their butt out. That is okay.. just keep the tapping up and make sure their head is always facing the trailer. Let them figure out the best way to enter the trailer and that moving forward means the tapping stops. Many people want to circle the horse if they aren't lined up straight to the entrance. This is a mistake because the horse figures out that they get to move away from the trailer when they are crooked. What they have done is trained you to release them from the scary object by going crooked. Guess what? They will do it over and over again! Just let them figure it out that going crooked is not the best method for them. When they bump into the divider a few times they will figure out going straight is better.
Once they are fully in, you can put up the butt bar and go around front to release the lunge line.
The good part about this method is that eventually they learn to self load and there is not major stress to it for the horse.
Warning -- this method can take a long time -- I've spent well over an hour getting a horse on a trailer but once they do it easy to repeat and the second time takes MUCH less time. I've also had this method work in just few minutes though. The key is patience. Be prepared to take as long as it takes the horse to learn on their own that moving forward is the key to release of tapping annoyance.
Subscribe to:
Posts (Atom)